1b326d No.24909 [Last 50 Posts]
Last thread was bump-locked. Starting a new thread because I'm a narcissist, but also trying to salvage anything worthwhile from the last thread into copypasta. :)
After getting frustrated at MudBox and listening to some feedback here, I've decided to try and learn from the ground up using Blender.
ITT: Beginning 3D in Blender
Specifically, I think I'm going to stick to this playlist and try to get 100% through it before moving on:
https://www.youtube.com/playlist?list=PLda3VoSoc_TR7X7wfblBGiRz-bvhKpGkS
Resources:
YouTube channels:
the d-dub show / ward7299
https://www.youtube.com/user/ward7299
Blender Guru
https://www.youtube.com/channel/UCOKHwx1VCdgnxwbjyb9Iu1g
BornCG
https://www.youtube.com/channel/UCdioEctcBLd2nw2aQkl8msw
Websites:
http://www.blender.org/support/tutorials/
http://www.blenderguru.com/
https://cgcookie.com/learn-blender/
http://www.blendernation.com/
"youtube user MetalX1000 has one of the oldest and most complete programming and development channels, and has several playlist of blender game engine and blender render tutorials.
Here's his playlist of Blender Game Engine development with python, which will basically leave you ready to start your first project.
https://www.youtube.com/playlist?list=PLBD687C66079FA40F"
"Blender's documentation is notably crappy, with entire versions having no documentation whatsoever, so if you're not already a member of the http://blenderartists.org/forum/ and http://blender.stackexchange.com/ you're gonna have a bad time as soon as you can't find an updated tutorial on that one very specific thing."
"This looks popular on Amazon, and covers 2.7 the newest version:
The Complete Guide to Blender Graphics, Second Edition: Computer Modeling and Animation 2nd Edition
http://www.amazon.com/Complete-Guide-Blender-Graphics-Second/dp/1482216639/ref=sr_1_1?s=books&ie=UTF8&qid=1442589600&sr=1-1&keywords=blender+2.7"
"http://blender.stackexchange.com/questions/696/how-to-reset-the-center-of-rotation-of-the-3d-view-when-it-is-not-the-center-of
Use the period button on the ten key to reset camera back to the selected object. Nice. I'm sure there is somewhere in the settings to make the "orbit selected object" default, gotta find that later."
"after hitting S to scale, I can hit X Y or Z to then limit it to that axis, like using the manipulators."
"S to scale, then Shift + Z to scale on the X and Y at the same time (so, s for scale, shift z for "not Z")."
"I like this guy because he comments everything he does. His videos are about general modeling/animation, which doesn't always works in game dev (especially his animation techniques), but, I've learned more from him than any other youtuber, only because of the way he is teaching...
https://www.youtube.com/user/aadigitalproductions/videos"
http://www.cheatography.com/mikero/cheat-sheets/blender-2-7-basic/
Basics
Shift + A
Add menu
Tab
Toggle Object Mode/ Edit Mode
Selection
A
Select all / Deselect all
B
Border select
C
Circle select
Edit
CTRL + S
Save
CTRL + Z
Undo
CTRL + Shift + Z
Redo
Editing
G
Move
R
Rotate
S
Scale
E
Extrude region
Alt + E
Extrude menu
F
Create Face / Edge
LMB + Shift + K
Knife cut midpoint
Alt + M
Merge menu
CTRL + R
Loop cut
U
UV Mapping menu
W
Specials menu
Camera
NUM 1
Front view
NUM 3
Side view
NUM 7
Top view
CTRL + NUM 1
Back view
CTRL + NUM 3
Side view
CTRL + NUM 7
Top view
T - Toolshelf menu on the left
N - Properties
>Would be nice to be able to "orbit" the object itself, and not some center-point as seems default.
File > User Preferences > Interface tab > Check "Rotate Around Selection"
File > User prefs > Themes tab > Science Lab (noice)
File > User prefs > System tab > DPI. Default is 72, 76-80 is easier on the eyes
To use OpenGL (AMD):
User Preferences > System > Compute Device Panel, and configure it as you desire.
500 sample image took 00:47.64 with OpenGL, 00:51.48 with CPU. 1.08 times faster with the GPU
http://answers.unity3d.com/questions/560663/blender-vs-mudbox-workflow-for-games.html
Answer by VesuvianPrime · Oct 22, 2013 at 12:49 PM
Deygus, a typical workflow for games:
1) Build your low-poly character in a modelling tool like Maya, 3DSMax, Blender, etc
2) UV map the character
3) Export the character into zBrush/Mudbox
4) Do your high-poly sculpting
5) Bake out the detail into a normal map
6) Apply the normal map to your low poly character
After adding the mirror modifier, click "clipping" to keep the two halves "glued" together.
When using "I" insert of faces, like for the mouth, make sure to uncheck "Boundary" to make it work correctly along the mirror modifier.
____________________________
Disclaimer: this post and the subject matter and contents thereof - text, media, or otherwise - do not necessarily reflect the views of the 8kun administration.
1b326d No.24910
YouTube embed. Click thumbnail to play.
Home-made Render Farm
https://www.blender.org/manual/render/output/video.html
An easy way to get multiple machines to share the rendering workload is to:
Set up a shared directory (such as a Windows Share or an NFS mount)
Un-check “Overwrite” and check “Placeholders”
Start as many machines as you wish rendering to that directory – they will not step on each other’s toes.
Dropbox would make this super easy to do. Each computer has Dropbox installed along with Blender. Have it render directly to the Dropbox\blender\YourProject folder with placeholders. Each computer picks up a frame, renders it in its own time, and uploads it to the shared Dropbox. The slow ones falls behind rendering what they can, the fast ones skip ahead. However, that'll leave you with a bunch of frames that will still need to be rendered into video and I don't know how to do that yet. Adobe Premier is not cheap.
Could also be done with a home file server too:
How to Turn an Old PC Into a Home File Server
'http://www.howtogeek.com/190835/how-to-turn-an-old-pc-into-a-home-file-server/''
I set up a home blender render farm years ago as a proof of concept, but I hardly remember much about it. We got it working, but I never had a project that really needed the horsepower. I would use it today to render "cutscenes" because I miss FMV or game trailers I guess. It would be fun to know how to make my own home-made pixar-style "novelette".
I had an issue where I had applied both a cloth physics modifier and a subserf modifier at the same time to the same object and it wasn't rendering the movement out in the animation. To fix it, I had to make sure the cloth was above the sub serf in the listing of modifiers.
How do I set a background image while I am editing?
http://blender.stackexchange.com/questions/118/how-do-i-set-a-background-image-while-i-am-editing
Bump mapping
https://www.wikiwand.com/en/Bump_mapping
Bump mapping[1] is a technique in computer graphics for simulating bumps and wrinkles on the surface of an object. This is achieved by perturbing the surface normals of the object and using the perturbed normal during lighting calculations. The result is an apparently bumpy surface rather than a smooth surface although the surface of the underlying object is not actually changed. Bump mapping was introduced by James Blinn in 1978.
Normal mapping is the most common variation of bump mapping used.
Parallax mapping
https://www.wikiwand.com/en/Parallax_mapping
Parallax mapping (also called offset mapping or virtual displacement mapping) is an enhancement of the bump mapping or normal mapping techniques applied to textures in 3D rendering applications such as video games. To the end user, this means that textures such as stone walls will have more apparent depth and thus greater realism with less of an influence on the performance of the simulation. Parallax mapping was introduced by Tomomichi Kaneko et al., in 2001.
Parallax mapping is implemented by displacing the texture coordinates at a point on the rendered polygon by a function of the view angle in tangent space (the angle relative to the surface normal) and the value of the height map at that point. At steeper view-angles, the texture coordinates are displaced more, giving the illusion of depth due to parallax effects as the view changes.
Optimizing blender’s real time mesh drawing, part 1
https://code.blender.org/2015/06/optimizing-blenders-real-time-mesh-drawing-part-1/
7 Essential Resources & Tips to Get Started with Game Development
https://medium.com/@ZEEFcom/7-essential-resources-tips-to-get-started-with-game-development-d7379db2273b
Disclaimer: this post and the subject matter and contents thereof - text, media, or otherwise - do not necessarily reflect the views of the 8kun administration.
1b326d No.24911
YouTube embed. Click thumbnail to play.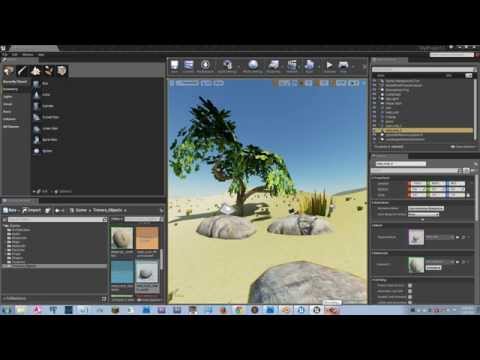
CTRL + TAB while in edit mode to quick select vertex, edge, or face
Select faces and press S, Z, 0 to "flatten" them like to the floor/ground
http://www.ogre3d.org/tikiwiki/Blender+Exporter
The script OGRE Meshes Exporter converts meshes and armatures from Blender to OGRE file format XML / binary mesh / material file). It supports the export of
mesh objects with vertex colours, multiple materials, UV textures and blend modes,
a multitude of material properties, most notably: ambient, diffuse, specular, emissive, UV textures with and without alpha channel, vertex colours, normal maps, two sided faces,
keyframe animations of armature actions as skeleton animations,
keyframe animations of relative mesh shapes as pose or morph animations.
I also found an export guide specifically for Second Life:
http://wiki.secondlife.com/wiki/Mesh/Exporting_a_mesh_from_Blender
What are you exporting to? Like what is further down the pipeline?
And here is the Blender documentation:
https://www.blender.org/manual/data_system/files/import_export.html
Blender supports import and export to and from other file formats (e.g. OBJ, FBX, 3DS, PLY... etc).
http://www.the-blueprints.com/blueprints/weapons/
https://s3.amazonaws.com/blenderguru.com/uploads/2015/03/Concrete11.jpg
http://www.blenderguru.com/tutorials/basics-realistic-texturing/
To subdivide a plane:
1. Tab to go to edit mode
2. W to bring up menu
3. Subdivide
4. Press T to bring up the tool menu to select how far to subdivide it
AwesomeBump is a free and open source program written using Qt library designed to generate normal, height, specular or ambient occlusion, metallic, roughness textures from a single image. Additional features like material textures or grunge maps are available. Since the image processing is done in 99% on GPU the program runs very fast and all the parameters can be changed in real time. AB was made to be a new alternative to known gimp plugin called Insane Bump or commercial tool: Crazy Bump.
AwesomeBumpv4.0 for Win7/8 x32
https://github.com/kmkolasinski/AwesomeBump/releases/tag/Winx32v4.0
This is a little confusing at first, but you get used to it really quick. Click on the 'Diffuse' tab, and drag your image into there. At the bottom (make sure the Diffuse tab is active) click on the checkbox labeled "Basemap to others" and then click the button that says Convert N to H. From there you can tweak the settings
http://blenderartists.org/forum/showthread.php?364529-AwesomeBump-A-free-alternative-to-CrazyBump
http://blenderartists.org/forum/showthread.php?366395-AwesomeBump-3-0-beta-released
http://blenderartists.org/forum/showthread.php?366395-AwesomeBump-3-0-beta-released!/page4
In general, I have been doing the following:
Start AwesomeBump
Change to Diffuse Tab
Open a photo of, for example, a rock wall
Check the "Enable Preview" button
Hit the "Convert to N H" button
Un-check the Enable Preview button
Start tweaking.
Basically the processing should be as you described above.
Hope this clarified your doubts
Multi-View Render
https://www.blender.org/manual/render/workflows/multiview.html
For this 5-minute guide we will take an existent .blend file that was made for monoscopic rendering and transform it in stereo-3d ready.
How to apply Matcap materials for sculpting in Blender 2.71?
Simple out-of-the-box matcaps that work with cycles:
http://blender.stackexchange.com/questions/16339/how-to-apply-matcap-materials-for-sculpting-in-blender-2-71
Adding your own gets quite a bit more tricky if you want to stay in cycles. You can download ZMT files here:
Welcome to Pixologic's MatCap Library
http://pixologic.com/zbrush/downloadcenter/library/
But I don't think Blender supports them natively. Couple work arounds:
http://blenderartists.org/forum/showthread.php?174790-ZBrush-matcap-in-Blender&highlight=matcap
http://blenderartists.org/forum/showthread.php?303899-SOLVED-matcap-in-cycles-with-nodes
http://terrance8d.deviantart.com/journal/Quick-Tip-Using-Custom-Matcaps-in-Blender-538588988
Might dig into the work-arounds at some point, but for now the quick and easy defaults should be more than enough for me.
Historical Poly Counts
http://www.gameartisans.org/forums/threads/23520-Historical-Poly-Counts
Half-Life, PC, 1998
Zombie – 844 polygons
High Definition pack Zombie- 1700 polygons
Half-Life, Dreamcast, 2000-2001 (Canned)
Zombie - 1649 polygons
Half-Life, PS2, 2001
Zombie - 2822 (Highest LOD)
Quake, PC, 1996
200 polygons with 1 320×200 8bit texture using predefined palette.
Unreal Tournament, PC, 1999
Player model – 800 polygons
Unreal Tournament 2k3, PC, 2003
Player model – 3,000 polygons
GTA San Andreas, PS2, 2004
Characters – 2,000 polygons with 1 256×256 8bit texture
NPCs - 1,200 polygons with 1 256x128 8bit texture
Gant bridge - 16,000 polygons, includes LOD
Disclaimer: this post and the subject matter and contents thereof - text, media, or otherwise - do not necessarily reflect the views of the 8kun administration.
1b326d No.24914
YouTube embed. Click thumbnail to play.
Blender to Unreal Engine 4 in a Nutshell
Learn the basics of getting your assets from Blender to Unreal Engine 4 in just 5 minutes! If you run into problems or have questions, please ask in the comments.
Used were Blender 2.70a and Unreal Engine 4.0.2.
UNITS & AXES
0:10 - Units
0:31 - Axes
STATIC MESHES
0:49 - Blender FBX export
1:47 - Unreal FBX import
1:59 - Collision
2:51 - Materials & UVs
SKELETAL MESHES
3:43 - Seriously, triple check it!
4:07 - Unreal FBX import
4:45 - Thanks :)
Disclaimer: this post and the subject matter and contents thereof - text, media, or otherwise - do not necessarily reflect the views of the 8kun administration.
1b326d No.24915
YouTube embed. Click thumbnail to play.
Blender to Unity Tutorial - Import with Textures
Just a quick video to show my method of bringing 3d models from Blender into Unity and applying the Texture.
Disclaimer: this post and the subject matter and contents thereof - text, media, or otherwise - do not necessarily reflect the views of the 8kun administration.
1b326d No.24916
YouTube embed. Click thumbnail to play.
Blender Character To Unity part 1 of 2
Disclaimer: this post and the subject matter and contents thereof - text, media, or otherwise - do not necessarily reflect the views of the 8kun administration.
1b326d No.24917
YouTube embed. Click thumbnail to play.
Blender Character Creation: Modelling
Welcome to the first episode in a series on creating a simple character in Blender. (http://blender.org)
Download reference images:
http://i.imgur.com/7LPDejZ.jpg (front)
http://i.imgur.com/Bjfeafn.jpg (side)
Download blender file:
http://www.blendswap.com/blends/view/...
FAQ:
Q: My background images won't show up after dragging them in.
A: Ensure that your view is properly aligned (press 1 on numpad to set view from front). You also need to be in orthographic (as opposed to perspective) view. You can toggle between ortho and perspective with 5 on the numpad. As an alternative to dragging the images in, you can press 'n' to open the properties panel, and add an image manually in the 'Background Images' section near the bottom.
Q: Pressing the numbers only changes frame/layer.
A: You need to press the numbers on the numpad. If your keyboard does not have a numpad, go into preferences and in the input tab check 'emulate numpad'.
Follow me on twitter @SebastianLague
Disclaimer: this post and the subject matter and contents thereof - text, media, or otherwise - do not necessarily reflect the views of the 8kun administration.
1b326d No.24918
YouTube embed. Click thumbnail to play.
The Basics of Good Texturing in Blender
Blender tutorial showing you how to create your own realistic material and textures. Download the texture: http://www.blenderguru.com/tutorials/...
Disclaimer: this post and the subject matter and contents thereof - text, media, or otherwise - do not necessarily reflect the views of the 8kun administration.
1b326d No.24919
YouTube embed. Click thumbnail to play.
The Secrets of Realistic Texturing in Blender
In this tutorial you will discover:
-The fundamentals of texturing
-How to use CrazyBump to generate better textures
-How to make a realistic cobblestone material
Disclaimer: this post and the subject matter and contents thereof - text, media, or otherwise - do not necessarily reflect the views of the 8kun administration.
1b326d No.24922
YouTube embed. Click thumbnail to play.
AwesomeBump - Tutorial #3: Generating textures from image
This video shows how to generate - normal, height, specular and occlusion map from a single image using AwesomeBump software.
AwesomeBump website: http://awesomebump.besaba.com/
Disclaimer: this post and the subject matter and contents thereof - text, media, or otherwise - do not necessarily reflect the views of the 8kun administration.
1b326d No.24923
YouTube embed. Click thumbnail to play.
Introduction to Dynamic Topology Sculpting in Blender
Learn how to use Dynamic Topology Sculpting in Blender
http://cgcookie.com/blender/2013/04/2...
The dynamic topology system in Blender allows for a much more organic, creative sculpting process. It gives you much more flexibility in not only how, but what you sculpt by not limiting you to the original starting basemesh.
When working with dynamic topology, Blender will automatically tessellate the mesh under your brush stroke to account for the detail needed. This gives you the ability to add detail anywhere you wish, create new forms, and work with a much more optimized polycount since the tessellations are localized.
Check out CG Cookie Citizen for more sculpting training: http://cgcookie.com/membership
To learn more about using dynamic topology in your workflow and creating finished sculptures I also recommend you check out:
Creature Modeling For Production: http://cgcookie.com/downloads/creatur...
Hard-Surface Sci-Fi Weapon Sculpting: http://cgcookie.com/blender/cgc-serie...
Disclaimer: this post and the subject matter and contents thereof - text, media, or otherwise - do not necessarily reflect the views of the 8kun administration.
1b326d No.24924
YouTube embed. Click thumbnail to play.
How To Unwrap A UV Sphere In Blender
In this mini tutorial I go over how to unwrap a UV Sphere for usage with Equirectangular maps and tilable textures as well due to it's seamless UV layout. Check out the text version of this tutorial on my website: http://enigmatoots.wix.com/enigmatoot....
You can get the images of Earth from here: http://visibleearth.nasa.gov/
Check out this video and others at my website: www.enigmatoots.co.uk. Feel free to contact me there or by emailing me at enigmatoots@hotmail.co.uk :)
Keep up to date on twitter: https://twitter.com/Enigma_Toots
Follow me on Google+: https://plus.google.com/1058652631047...
Good Luck with your Blenderations and have a nice day :)
Disclaimer: this post and the subject matter and contents thereof - text, media, or otherwise - do not necessarily reflect the views of the 8kun administration.
1b326d No.24925
YouTube embed. Click thumbnail to play.
Cycles' Volume Materials
Here I just go over the new volume nodes available in the Cycles Render Engine, and how to make some pretty marbles using the Volume Absorption node.
My text guide on Volumetric Lighting can be found here:
http://www.enigmatoots.co.uk/#!volume...
A great tutorial on smoke/fire rendering can be found here:
https://www.youtube.com/watch?v=oSiV5...
Check out this video and others at my website: www.enigmatoots.co.uk. Feel free to contact me there or by emailing me at enigmatoots@hotmail.co.uk :)
Keep up to date on twitter: https://twitter.com/Enigma_Toots
Follow me on Google+: https://plus.google.com/+EnigmatootsC...
Good Luck with your Blenderations and have a nice day :)
Disclaimer: this post and the subject matter and contents thereof - text, media, or otherwise - do not necessarily reflect the views of the 8kun administration.
1b326d No.24927
I wanted to learn more with 3dsmax but I'm a beginner so should I learn the basics with blender? I'm going to assume a lot of general principles carry over.
Disclaimer: this post and the subject matter and contents thereof - text, media, or otherwise - do not necessarily reflect the views of the 8kun administration.
1b326d No.24928
>>24927
Yes, learning the art is essentially independent of the tools you use. You will, of course, know and come to adopt the methodology of whatever tool you do choose, but Blender is a good choice for a number of reasons.
What you learn in Blender will carry over to 3DSMax later.
Disclaimer: this post and the subject matter and contents thereof - text, media, or otherwise - do not necessarily reflect the views of the 8kun administration.
1b326d No.24930
>>24927
3DS max is suprisingly really easy to use, and it is an industry standard along with 4D studio, MAYA and blender, just use what you got honesly. I use maya.
Disclaimer: this post and the subject matter and contents thereof - text, media, or otherwise - do not necessarily reflect the views of the 8kun administration.
1b326d No.24958
YouTube embed. Click thumbnail to play.
Blender 2.7 Tutorial #33 : Sharp Edges on Smooth Objects #b3d
Visit my Blender 2.7 Tutorial Series playlist for more Blender Tutorials:
In this Tutorial #33 I cover:
-How to create hard/sharp edges on otherwise smooth objects using two methods:
#1) A Combination of Edge Creases, the Edge Split modifider, and marking edges as sharp.
#2) Using Proximity Loop (make an extra edge loop on either side of an edge you want to be sharp)
Disclaimer: this post and the subject matter and contents thereof - text, media, or otherwise - do not necessarily reflect the views of the 8kun administration.
1b326d No.25010
YouTube embed. Click thumbnail to play.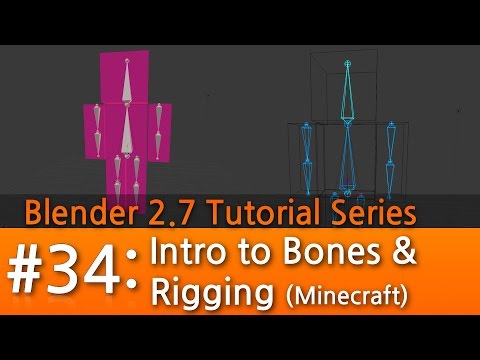
Blender 2.7 Tutorial #34 : Intro to Bones & Rigging (Minecraft) #b3d
In this Tutorial #34 I cover:
-How to create a simple six-block minecraft human
-Loop cut tool (ctrl-R)
-Bevel tool (ctrl-B)
-Adding an Armature object, adding more bones to an armature in edit mode.
-Naming bones
-Recalculating bone roll (ctrl-N)
-the Snap menu (shift-S)
-Attaching an armature to a character mesh using automatic weights.
Disclaimer: this post and the subject matter and contents thereof - text, media, or otherwise - do not necessarily reflect the views of the 8kun administration.
1b326d No.25135
Self-post, I want to try this shit out. Politely saging my own thread.
Pixel Shader Tutorial
http://initialsgames.com/main/?p=1360
The instructions are in Japanese. With online translating tools, this isn’t a big deal, but the program itself is quite hard to get started with, so let’s take a look at how to use it.
Disclaimer: this post and the subject matter and contents thereof - text, media, or otherwise - do not necessarily reflect the views of the 8kun administration.
1b326d No.25144
>>25010
Finally got this done.
Disclaimer: this post and the subject matter and contents thereof - text, media, or otherwise - do not necessarily reflect the views of the 8kun administration.
1b326d No.25145
YouTube embed. Click thumbnail to play.
Quick Rigging With Rigify in Blender
Disclaimer: this post and the subject matter and contents thereof - text, media, or otherwise - do not necessarily reflect the views of the 8kun administration.
1b326d No.25147
Disclaimer: this post and the subject matter and contents thereof - text, media, or otherwise - do not necessarily reflect the views of the 8kun administration.
1b326d No.25149
>>25147
Nice man, I like it.
Disclaimer: this post and the subject matter and contents thereof - text, media, or otherwise - do not necessarily reflect the views of the 8kun administration.
1b326d No.25153
YouTube embed. Click thumbnail to play.
Blender 2.7 Tutorial #35 : Weight Paint Mode (Minecraft) #b3d
In this Tutorial #35 I cover:
-After connecting an armature (bones) to a character mesh, the best way to make sure the bones properly control the correct parts of the mesh is by using weight paint mode.
-In this video I'll show you how to use weight paint mode to paint 'weights' (the amount of influence each bone has on each vertex) easily and quickly. I also cover how to *mask* parts of your mesh (in this case each block of the Minecraft person) to make it easier to paint only the sections you want.
https://www.blender.org/manual/painting_sculpting/painting/weight_paint/index.html
Disclaimer: this post and the subject matter and contents thereof - text, media, or otherwise - do not necessarily reflect the views of the 8kun administration.
1b326d No.25156
Disclaimer: this post and the subject matter and contents thereof - text, media, or otherwise - do not necessarily reflect the views of the 8kun administration.
1b326d No.25157
>>25153
To reset the pose:
Select all the bones with A
Alt + R
Alt + G
Alt + S
Use Mix brush.
Disclaimer: this post and the subject matter and contents thereof - text, media, or otherwise - do not necessarily reflect the views of the 8kun administration.
1b326d No.25336
Disclaimer: this post and the subject matter and contents thereof - text, media, or otherwise - do not necessarily reflect the views of the 8kun administration.
1b326d No.25487
Any good info on how to just get better at modeling and sculpting in general? I have a lot of tools down at just don't have good workflow and all that.
Disclaimer: this post and the subject matter and contents thereof - text, media, or otherwise - do not necessarily reflect the views of the 8kun administration.
1b326d No.25521
>>25487
For sculpting, work with references. Start with something that ticks your fancy, like a woman's body. Learn Zbrush's most-used brushes (Standard, Damian Standard, Clay, Move).
Your Zbrush workflow can be something like mine, which is like the 3rd pic's (minus the 3DCoat retopo part, no one uses that anymore):
1a. ZModeler (to make a low-poly base mesh)
OR
1b. Start from a simple sphere, or something made out of Zspheres, whatever
2. Dynamesh (start sculpting in the basic shapes of your model)
3. Decimation Master to lower the res and to make it easier for...
4. ZRemesher (to retopologize and clean your model up, making it easier to...)
5. Sub-divide your mesh (for final surface detailing work)
Lots of further tutorials you can torrent at CGPeers, too. So try to look into that. If you need base models and can't ass yourself to make your own, there should be .obj's floating around that people donate freely on the 'net.
Disclaimer: this post and the subject matter and contents thereof - text, media, or otherwise - do not necessarily reflect the views of the 8kun administration.
1b326d No.25522
>>25521
And of course, by "3rd pic", I meant "4th pic".
Disclaimer: this post and the subject matter and contents thereof - text, media, or otherwise - do not necessarily reflect the views of the 8kun administration.
1b326d No.25531
Is it better to simply make models in blender or sculpt them in zbrush for some not so advanced 3D game?
Disclaimer: this post and the subject matter and contents thereof - text, media, or otherwise - do not necessarily reflect the views of the 8kun administration.
1b326d No.25539
>>25531
Blender is faster and already has all the tools you need for rigging and animating characters, things which ZBrush does not have. There's even a Sculpt mode with all the basic features from ZBrush, too.
If you're working with Minecraft-tier stuff or Nintendo DS-level models, there's no pressing need to go into sculpts.
Disclaimer: this post and the subject matter and contents thereof - text, media, or otherwise - do not necessarily reflect the views of the 8kun administration.
1b326d No.25561
>>25522
Ok makes more sense now.
>>25539
That pic is so aesthetic.
Disclaimer: this post and the subject matter and contents thereof - text, media, or otherwise - do not necessarily reflect the views of the 8kun administration.
1b326d No.25562
learning 3d modelling is just as easy as learning to paint
just do a lot of still life from references or actual physical things lying on your desk
do one every day
you're the best
Disclaimer: this post and the subject matter and contents thereof - text, media, or otherwise - do not necessarily reflect the views of the 8kun administration.
1b326d No.25564
>>25487
This was from the last Beginning 3D thread:
>http://answers.unity3d.com/questions/560663/blender-vs-mudbox-workflow-for-games.html
>Answer by VesuvianPrime · Oct 22, 2013 at 12:49 PM
>Deygus, a typical workflow for games:
>1) Build your low-poly character in a modelling tool like Maya, 3DSMax, Blender, etc
>2) UV map the character
>3) Export the character into zBrush/Mudbox
>4) Do your high-poly sculpting
>5) Bake out the detail into a normal map
>6) Apply the normal map to your low poly character
Beyond that, I think it is just practice, practice, practice! Just like render art!
Disclaimer: this post and the subject matter and contents thereof - text, media, or otherwise - do not necessarily reflect the views of the 8kun administration.
1b326d No.25575
YouTube embed. Click thumbnail to play.
Blender 2.7 Tutorial #36 : UV Mapping for Minecraft #b3d
''In this Tutorial #36 I cover:
Detailed instructions on how to add a Minecraft-like texture to a simple character:
-The process of marking seams, unwrapping, laying out a UV Map, Exporting a UV Map into Photoshop or Gimp.
-Painting a texture in Photoshopusing layers and the Dodge/Burn tool, Pixelating the texture using Photoshop's Mosaic Filter, saving .psd file and exporting to PNG, finally applying the texture back onto the character model in Blender
Remember, before UV unwrapping, go into object mode, then object menu > Apply > Scale
Disclaimer: this post and the subject matter and contents thereof - text, media, or otherwise - do not necessarily reflect the views of the 8kun administration.
1b326d No.25577
Click this button to sync up the UV editor window and your mesh, so I can select faces and see where they exist on my object. I'm not sure WTF this isn't clicked by default.
Disclaimer: this post and the subject matter and contents thereof - text, media, or otherwise - do not necessarily reflect the views of the 8kun administration.
1b326d No.25578
Use this to pack all images into the blend file, fucking brilliant. No more worrying about where da fuk did I put my textures FUUUUUUU. But bigger .blend files.
Also, my render thus far.
Disclaimer: this post and the subject matter and contents thereof - text, media, or otherwise - do not necessarily reflect the views of the 8kun administration.
1b326d No.25654
how the fuck would I do billboard sprites in blender.
i.e. a flat alphamapped quad that rotates to face the view in place. but can still be rigged to bones.
Disclaimer: this post and the subject matter and contents thereof - text, media, or otherwise - do not necessarily reflect the views of the 8kun administration.
1b326d No.25663
>>25654
For renders, I'm guessing you need to create a UV-mapped quad and then assign your vertex groups to it. Slap your image on to it (make the material Shadeless too), then go into Particles, create a new function and look for the Billboard option.
Don't forget to make a camera too.
Hit F12 and you should get something like pic related.
Then you can lose the rest of your day figuring out how to assign a translucent image to your particle (sprite), because I haven't found a way yet.
Disclaimer: this post and the subject matter and contents thereof - text, media, or otherwise - do not necessarily reflect the views of the 8kun administration.
1b326d No.25679
YouTube embed. Click thumbnail to play.
>>25663
>translucent
Translucent or transparent?
Blender 2.7 Tutorial #37 : IK Rigging (Part 1/2) #b3d
In this Tutorial #37 I cover:
-The difference between a simple FK armature rig, and a more advanced IK Rig.
-The creation and setup of bones and IK target bones to create a more advanced IK rig. This includes the overall structure, parenting, naming, and orienting of bones required.
Disclaimer: this post and the subject matter and contents thereof - text, media, or otherwise - do not necessarily reflect the views of the 8kun administration.
1b326d No.25680
Disclaimer: this post and the subject matter and contents thereof - text, media, or otherwise - do not necessarily reflect the views of the 8kun administration.
1b326d No.25681
YouTube embed. Click thumbnail to play.
>>25680
Blender 2.7 Tutorial #47 : Image Textures with Transparency #b3d
In this Blender 2.7 Tutorial #47 I cover:
-How to use a PNG image file's alpha channel as a "transparency map" for image textures in Blender Cycles. This will allow you to have textures with transparent areas, eg: surrounding the edge of the a leaf. :)
Disclaimer: this post and the subject matter and contents thereof - text, media, or otherwise - do not necessarily reflect the views of the 8kun administration.
1b326d No.25691
>>25681
Mm, I see. I'm just used to controlling transparencies straight from the Material menu.
Disclaimer: this post and the subject matter and contents thereof - text, media, or otherwise - do not necessarily reflect the views of the 8kun administration.
1b326d No.26058
Anyone know decent retopology tools for blender?
Disclaimer: this post and the subject matter and contents thereof - text, media, or otherwise - do not necessarily reflect the views of the 8kun administration.
1b326d No.26060
>>26058
Just activate the BSurface plugin mate!
Disclaimer: this post and the subject matter and contents thereof - text, media, or otherwise - do not necessarily reflect the views of the 8kun administration.
1b326d No.26596
Disclaimer: this post and the subject matter and contents thereof - text, media, or otherwise - do not necessarily reflect the views of the 8kun administration.
1b326d No.27245
Thanks for all the hard work OP. You've inspired me to pick Blender back up again.
I am currently writing some software to simulate robotics problems (my own code), and decided I should try and integrate with ROS to kind of standardize my approach. Long story short, while it was probably an OK idea, getting past dependency issues while trying to build on my current setup never really worked out.
Now I see I could have just used Blender all along for the visualization part (and much more very likely) and so I've got a copy of the latest code built on my system now and digging through it atm.
Appreciate it OP.
Disclaimer: this post and the subject matter and contents thereof - text, media, or otherwise - do not necessarily reflect the views of the 8kun administration.
1b326d No.27321
God i hate blender, which the faggots would fix their shitty ui and make it so you dont have to remember a shortcut for every goddamn command. then maby i would use it.
Disclaimer: this post and the subject matter and contents thereof - text, media, or otherwise - do not necessarily reflect the views of the 8kun administration.
1b326d No.27611
more related with Blender than game development, but is it possible for a one or two man team to make an animated short worth anything with Blender?
I look at 3D cartoons now on tv done by teams and the animation often looks stiff with the models looking mediocre at best, but is that just due to a lack of talent in the industry?
Disclaimer: this post and the subject matter and contents thereof - text, media, or otherwise - do not necessarily reflect the views of the 8kun administration.
1b326d No.27612
Disclaimer: this post and the subject matter and contents thereof - text, media, or otherwise - do not necessarily reflect the views of the 8kun administration.
1b326d No.27613
>>27321
Press space and type the command name you want.
Learn or set keybind until satisfied.
Disclaimer: this post and the subject matter and contents thereof - text, media, or otherwise - do not necessarily reflect the views of the 8kun administration.
1b326d No.27614
>>27321
>using any software without having hotkeys for everything that can be hotkeyed
It's like you enjoy being slow.
Disclaimer: this post and the subject matter and contents thereof - text, media, or otherwise - do not necessarily reflect the views of the 8kun administration.
1b326d No.27629
>>27245
No problem anon. OP here from a different computer. I let this thread go stale while picking up some Unreal experience, but now that I've got enough to get a shitty demo going I find myself needing art and coming back to this thread. Glad someone got something out of all this work. :)
>>27321
Use 3DSMax or Maya then?
>>27611
Good question, and I think it really depends on the scope of the project. Models, textures, animation, composition, lighting, editing, music, sound, etc are nothing to sneeze at. If you are looking at like 1-2 minutes long, simple, not complex and not too detailed I don't see why not. But to be honest I haven't done one in Blender so I am really just speaking out my ass. :)
Disclaimer: this post and the subject matter and contents thereof - text, media, or otherwise - do not necessarily reflect the views of the 8kun administration.
1b326d No.27650
>>27629
>Glad someone got something out of all this work. :)
Anon here from a different part of the country. Yup. In fact I'm building the latest releases of Blender at least 3 or 4 times a week now. Ton shared some cool news the Cycles renderer getting a sponsored full time engineer from an animation studio in Toronto working on a new film pretty much entirely in Blender.
>I also had a sneak peek of the excellent concept art of the new feature that’s in development – more budget, and much more ambitious even. For that project they offer to invest substantially in Blender, we spent the 2nd day on outlining a deal. In short that is:
> Tangent will sponsor two developers to work in Blender Institute on 2.8 targets (defined by us)
> Tangent will sponsor one Cycles developer, either to work in Blender Institute or in Toronto.
> All of this full time and decently paid positions, for at least 1 year. Can be effective in September.
https://www.blender.org/media-exposure/siggraph-2016-report/
So yea. I've personally met Ton and a few of the staff before at SIGGRAPH and they are all very cool guys. Glad to connect back again with this remarkable opensauce project. Thanks again.
Disclaimer: this post and the subject matter and contents thereof - text, media, or otherwise - do not necessarily reflect the views of the 8kun administration.
1b326d No.27724
Anyone here have advice for addons?
Disclaimer: this post and the subject matter and contents thereof - text, media, or otherwise - do not necessarily reflect the views of the 8kun administration.
1b326d No.27732
>>27724
I use this batch rename tool:
https://blenderartists.org/forum/showthread.php?272086-Addon-Item-Panel-amp-Batch-Naming
Pretty useful when you have a lot of things to rename, like objects, bones, vertex groups, etc. before porting the model to another software that uses different naming conventions, which normally would've taken you half an hour.
Disclaimer: this post and the subject matter and contents thereof - text, media, or otherwise - do not necessarily reflect the views of the 8kun administration.
1b326d No.27736
>>27724
thanks for the great poster anon. any others?
Disclaimer: this post and the subject matter and contents thereof - text, media, or otherwise - do not necessarily reflect the views of the 8kun administration.
1b326d No.27888
Disclaimer: this post and the subject matter and contents thereof - text, media, or otherwise - do not necessarily reflect the views of the 8kun administration.
1b326d No.27961
>>27321
>Not appreciating the essentiality of hotkeys
It's like you want to be unproductive and fail to meet all your deadlines or something.
Disclaimer: this post and the subject matter and contents thereof - text, media, or otherwise - do not necessarily reflect the views of the 8kun administration.
1b326d No.28197
>>24914
This video isn't quite the holy grail I was hoping it would be. UV especially from Blender to Unreal has been quite tricky. In fact, Unreal as a whole has been a HUGE chunk to bite off, so much so that I'm considering just going back to Blender only, and maybe joining a team as an artist rather than a solo (no-game) dev.
I just saw that the BornCG series I was following is up to like video 72 now. I think I'm going to go back through them to catch myself back up.
Disclaimer: this post and the subject matter and contents thereof - text, media, or otherwise - do not necessarily reflect the views of the 8kun administration.
